")
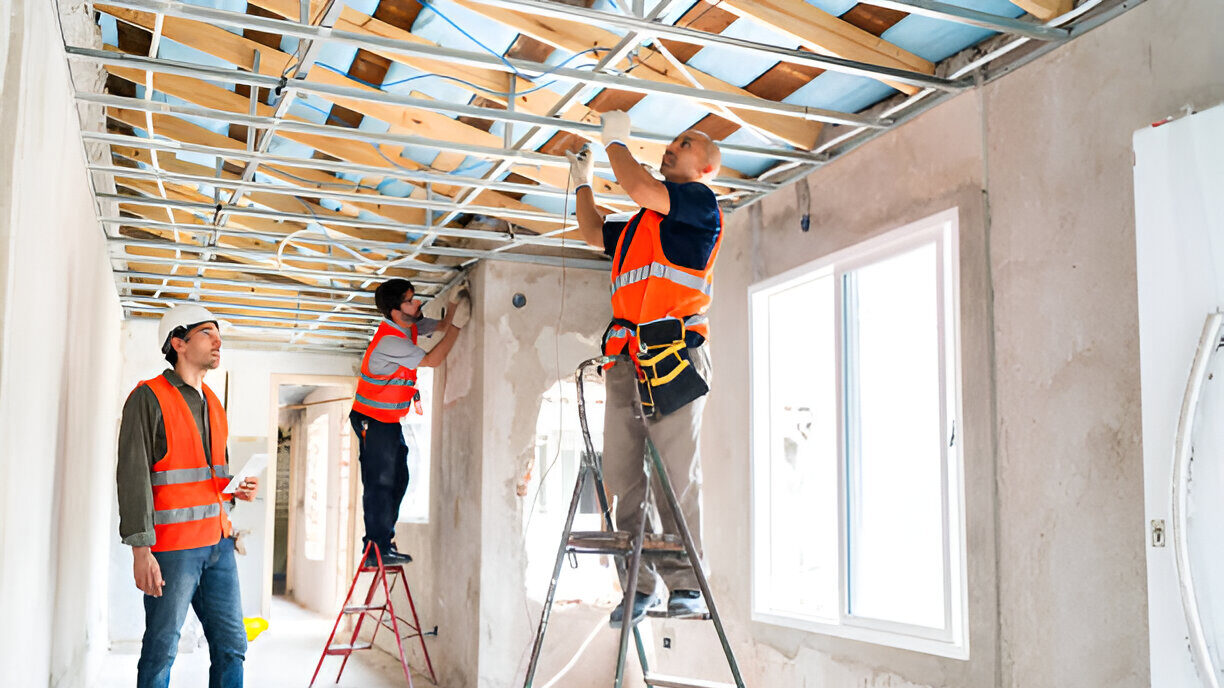
Rough-in electrical wiring plays a crucial role in construction, serving as the foundation for a safe and efficient electrical system. Rough-in is the stage of a construction project when mechanical, electrical, and plumbing lines are installed but not yet connected. Once the framing is up, the rough-in stage begins. This phase ensures that ductwork, plumbing, and wiring are positioned correctly, addressing space constraints and accessibility issues early in the process. Whether you’re wiring a house, a commercial building, or working on a renovation project, roughing in electrical systems is essential for long-term safety and functionality.
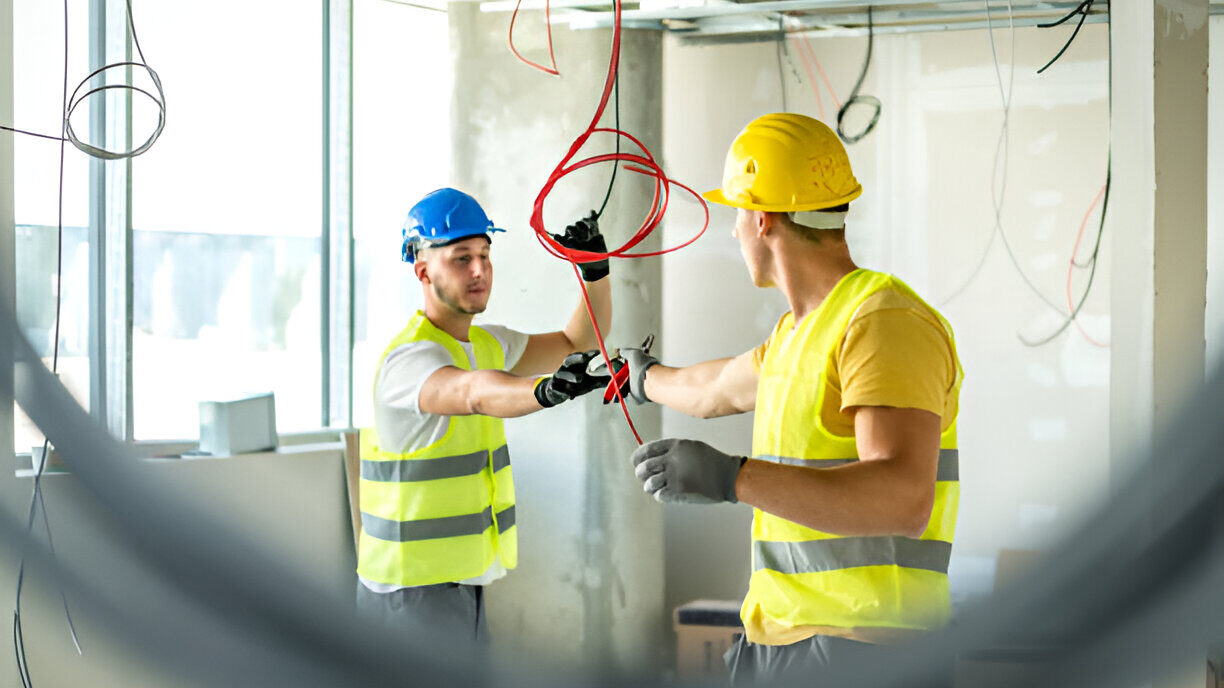
Roughing-In Electrical Wiring in Construction
The rough-in stage is a pivotal phase of construction, particularly for complex systems like electrical wiring. It ensures that infrastructure is in place before walls, ceilings, or floors are sealed.
Why Rough-In Matters in Construction:
- Early Problem Detection: Rough-ins allow electricians and builders to identify and resolve potential issues, such as insufficient spacing or accessibility conflicts.
- Coordination with Other Trades: Electrical rough-ins must align with plumbing and HVAC installations to avoid interference between systems.
- Inspection Readiness: During the construction process, rough-in inspections ensure that the work complies with building codes before moving to the next phase.
Rough-In Electrical Wiring: Construction Perspective
Electrical rough-in is integral to construction, ensuring that power supply systems are strategically placed. This includes everything from wall outlets and light switches to connections for HVAC and other essential systems.
What Does “Rough-In Electrical” Mean?
Rough-in electrical refers to the stage of electrical work where wires are installed but not yet connected to outlets, switches, or fixtures. This phase occurs before the walls are closed with drywall, making it easier to access the studs and joists.
Key Characteristics of Rough-In Electrical:
- Wires are run to their designated locations.
- Electrical boxes are installed and secured.
- The system is prepared for inspection by local authorities.
This process is foundational in ensuring the overall safety and functionality of your home’s electrical system.
Step 1: Planning Your Electrical Rough-In
Proper planning is the backbone of a successful electrical rough-in. Start by creating an electrical installation wiring diagram to map out your system.
Tips for Effective Planning:
- Assess Your Power Needs: List all appliances and fixtures to determine the number of circuits required.
- Locate Electrical Boxes: Decide where outlets, switches, and junction boxes will be placed for convenience and efficiency.
- Follow Code Requirements: Research local building codes to ensure your installation meets all legal standards.
A detailed plan minimizes errors and ensures a smoother process.
Step 2: Gathering Tools and Materials
Having the right tools and materials makes the rough-in process more efficient. Here’s what you’ll need:
Essential Tools:
- Wire strippers
- Fish tape
- Voltage tester
- Power drill with spade bits
- Hammer and screwdriver
Materials:
- Electrical boxes
- Cables (e.g., Romex or other NM cables)
- Cable staples
- Wire nuts and connectors
These items form the core of any rough electrical wiring project.
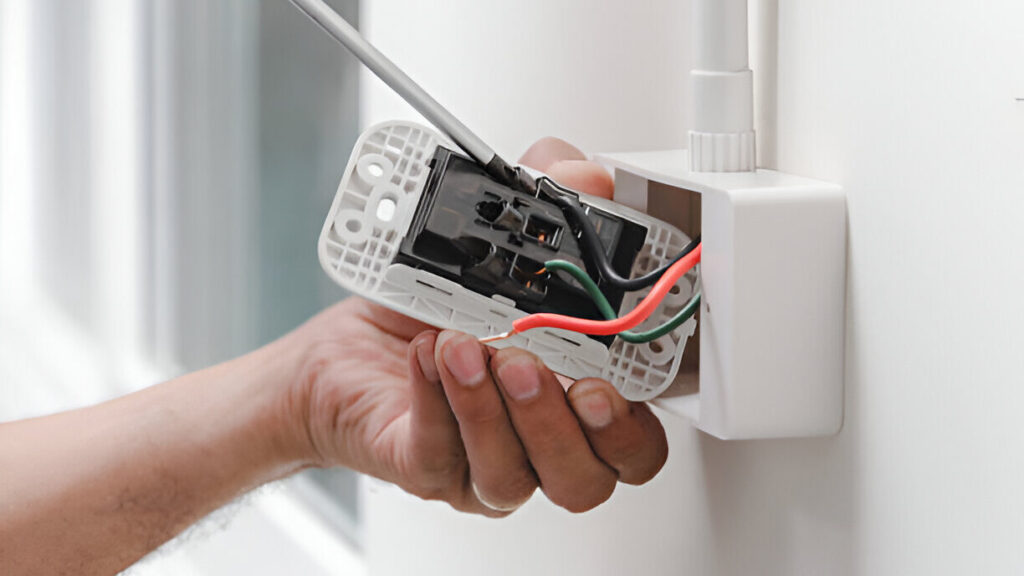
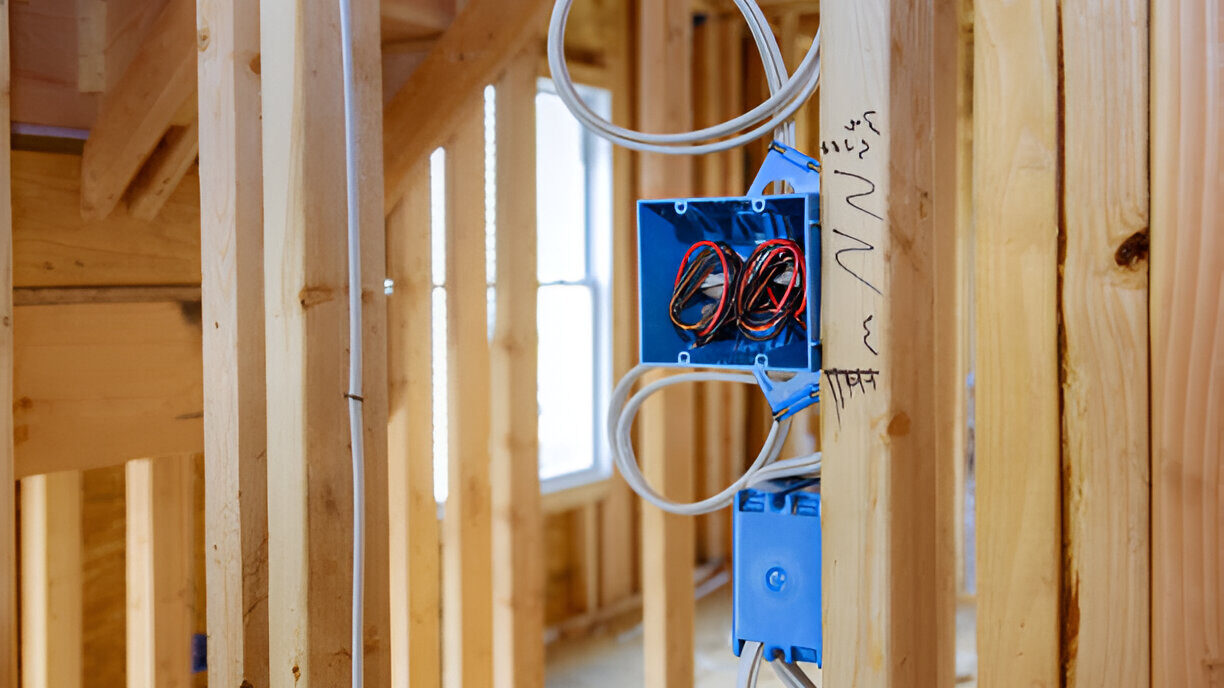
Step 3: Installing Electrical Boxes
Installing electrical boxes is the first hands-on step in the rough-in process. These boxes house switches, outlets, and light fixtures.
How to Install Electrical Boxes:
- Mark Locations: Use a pencil to mark box locations on the walls and ceilings.
- Secure Boxes: Attach them to studs or joists using screws or nails.
- Allow Clearance: Ensure the boxes extend slightly from the wall to align with drywall.
Electrical boxes must be sturdy and properly aligned for safe and convenient access.
Step 4: Drilling Holes for Wiring
Drilling holes allows you to run cables through walls and ceilings. This step requires precision and caution.
Steps to Drill Holes:
- Choose the Right Bit: Use a spade or auger bit suitable for the cable size.
- Position Holes Correctly: Drill in the center of studs to avoid weakening them.
- Maintain Clearance: Keep holes at least 1.25 inches from the edges of studs to prevent damage from nails or screws.
Drilled holes should provide a smooth path for wires without causing structural compromise.
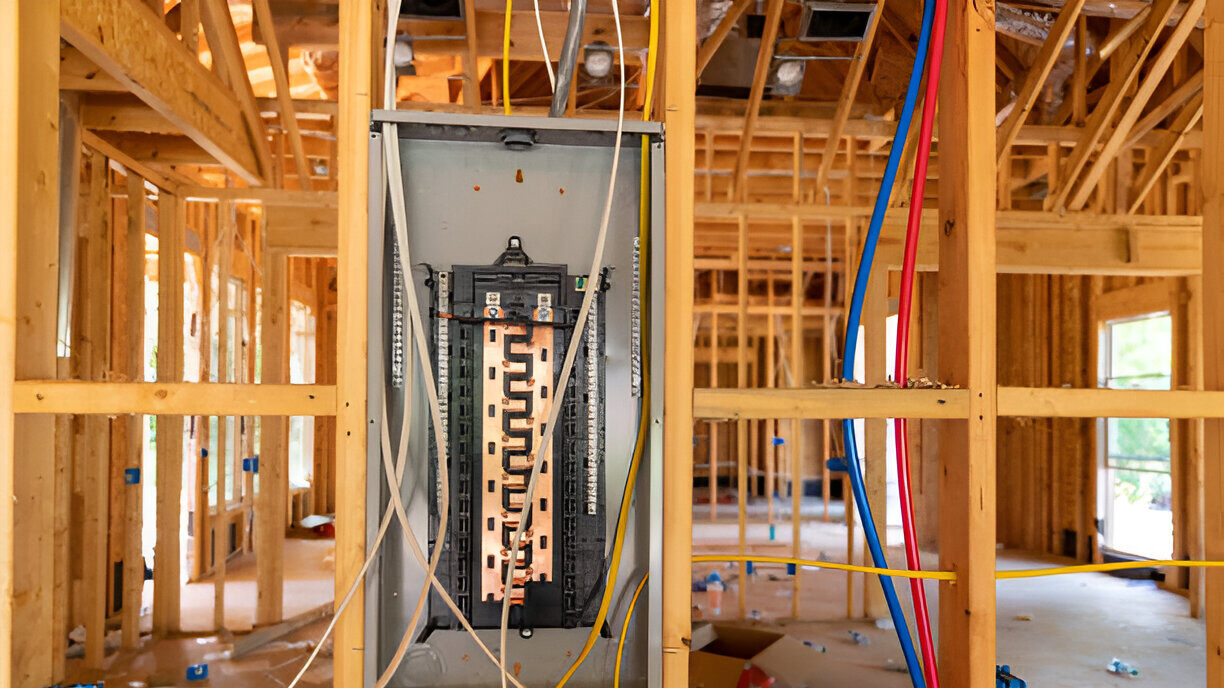
Step 5: Running the Electrical Wires
Running wires is the most critical part of roughing in electrical systems. This step requires careful handling to avoid future issues.
How to Run Wires:
- Start at the Panel: Begin at the electrical panel and route wires to their respective boxes.
- Secure Wires: Use cable staples to fasten wires along studs, ensuring they’re not too tight.
- Leave Extra Wire: Allow 6-8 inches of wire inside each box for connections.
Running wires neatly and securely sets the stage for a professional finish.
What Does It Mean to Stage a Wire?
Staging a wire involves preparing it for final connections without completing the circuit. This is an essential part of the rough-in process.
Staging Wires Involves:
- Stripping the insulation at wire ends.
- Folding wires neatly inside electrical boxes.
- Leaving enough length for easy access during the final connection phase.
Staging wires ensures that future installation steps can proceed smoothly and efficiently.
Step 6: Creating a Basic Electrical Wiring Diagram
A basic electrical wiring diagram is a visual representation of your system. It helps you stay organized and ensures compliance with codes.
How to Create a Wiring Diagram:
- Map Circuits: Label each circuit, noting its purpose and connected devices.
- Include Details: Indicate wire types, gauge, and lengths.
- Review for Accuracy: Double-check to ensure all connections are accounted for.
A clear diagram is invaluable for troubleshooting and inspections.
Step 7: Inspection and Compliance
Before moving to the next phase, your electrical rough-in must pass inspection. Local authorities will check for compliance with building codes.
Inspection Checklist:
- Proper wire placement and secure fastening.
- Correct sizing of electrical boxes.
- Adherence to clearance requirements.
Passing the inspection gives you the green light to proceed with drywall installation.
Read Also: Construction Site Safety Inspection: 7 Tips to Avoid Hazards
The Role of Rough Electrical in Construction
Rough electrical is the hidden backbone of modern construction projects. This stage lays the groundwork for all electrical systems in a building.
The Importance of Rough Electrical:
- Safety: Properly installed wiring prevents potential hazards like short circuits or overloads.
- Functionality: Strategic placement of outlets and switches ensures convenience for future occupants.
- Code Compliance: Meeting electrical rough-in requirements ensures the project passes inspections smoothly.
During construction, electricians work alongside builders to integrate electrical rough-ins seamlessly with the building’s framework.
How Rough-In Wiring Supports Energy Efficiency
Energy efficiency begins with a well-executed electrical rough-in. Proper planning reduces energy loss and supports eco-friendly systems.
Installing Efficient Circuits
Design circuits to handle appliances efficiently without overloading. Use materials that minimize resistance and energy loss.
Tips for Efficient Wiring:
- Choose high-quality wiring materials.
- Use a basic electrical wiring diagram to plan minimal circuit lengths.
- Position outlets and switches for easy access to devices.
Renewable Energy Integration
Planning for solar panels, wind turbines, or other renewable energy systems starts with roughing ins.
Why It Matters:
- Ensures smooth connection to renewable energy sources.
- Reduces energy costs long-term.
Rough-In Electric vs. Final Electrical Installation: What’s the Difference?
While both rough-in electrical and final installation are crucial stages, they serve distinct purposes. Understanding the difference helps clarify the steps of any wiring project.
What’s the Difference?
- Rough-In Electrical: During the rough-in phase, wires are run, and electrical boxes are installed, but no connections are made. Wires are staged and secured, but not yet connected to outlets, switches, or fixtures.
- Final Installation: In this phase, electricians will connect all the wires to outlets, switches, and devices. The system is then tested and ready for use.
The rough-in phase ensures the groundwork is laid for all the final connections, making it the foundation of your electrical system.
Why Rough-In Electrical Wiring is Critical in Renovation Projects
In renovations, rough-in wiring plays a similar role, ensuring new systems integrate seamlessly with existing infrastructure.
Unique Challenges in Renovations:
- Limited Access: Working within existing walls can make wiring more challenging.
- Compatibility: Ensuring new wiring aligns with older systems requires careful planning.
Rough-in allows electricians to upgrade or expand systems without disrupting the overall structure.
Key Tips for Wiring a House
How to wire a house can seem daunting, but with the right tools and knowledge, it’s manageable. When tackling a large project like this, proper planning and attention to detail are crucial.
Steps for Wiring a House:
- Create a Wiring Diagram: Always begin with a basic electrical wiring diagram. This provides a blueprint of your house’s electrical system.
- Choose the Right Wires: Use the correct gauge wire for different appliances and fixtures.
- Install Electrical Boxes and Run Wires: As part of the electrical rough-in, install electrical boxes at the appropriate locations and run wires securely.
- Check Code Compliance: Follow local regulations and code requirements to ensure safety.
Taking these steps during your electrical rough-in will help ensure a smooth final installation.
Common Challenges in Rough Electrical Wiring
Roughing in electrical systems isn’t without its challenges. Here are some issues you may encounter:
Challenges:
- Tight Spaces: Running wires in cramped areas can be tricky.
- Code Compliance: Keeping up with ever-changing codes requires attention to detail.
- Wire Damage: Avoid nicking or cutting wires during installation.
Planning ahead and using the right tools helps overcome these challenges.
Troubleshooting Common Rough Electrical Issues
Even with careful planning, rough electrical wiring can encounter issues that delay the installation process. Understanding common challenges can save time and effort during your project.
Common Issues:
- Incorrect Box Placement: If electrical boxes are not placed at the correct height or location, it can interfere with the final installation.
- Damaged Wires: Wires can be damaged during the rough-in process, especially when drilling holes or running wires through tight spaces.
- Improper Stapling: If wires are not stapled correctly, they can sag or be exposed to potential damage.
Roughing Ins for Different Scenarios
Electrical roughing ins vary depending on the type of structure and its requirements. Below are common scenarios:
For New Homes:
- Complete system design from scratch.
- Greater flexibility in wire placement and circuit design.
For Renovations:
- Working within existing structures.
- Additional challenges with access and space constraints.
Tailoring your approach to the scenario ensures a more efficient process.
Choose Apex Contractors Inc. for Your Residential and Commercial Projects
At Apex Contractors Inc., we specialize in delivering top-quality services for both residential and commercial construction needs. Whether you require scaffolding, brick pointing, remodeling, or quality pointing, our experienced professionals ensure precision, reliability, and unmatched craftsmanship in every project.
We take pride in our commitment to safety and excellence. Every project is conducted with strict adherence to safety standards, ensuring a secure and productive environment from start to finish.
Stay connected with us on Facebook and Instagram for updates, expert tips, and insights on how Apex Contractors Inc. can make your next project seamless and successful. Let us bring your vision to life with expertise you can trust!
Contact us today to discuss your construction needs and experience the Apex difference!